Saturday, June 17, 2006

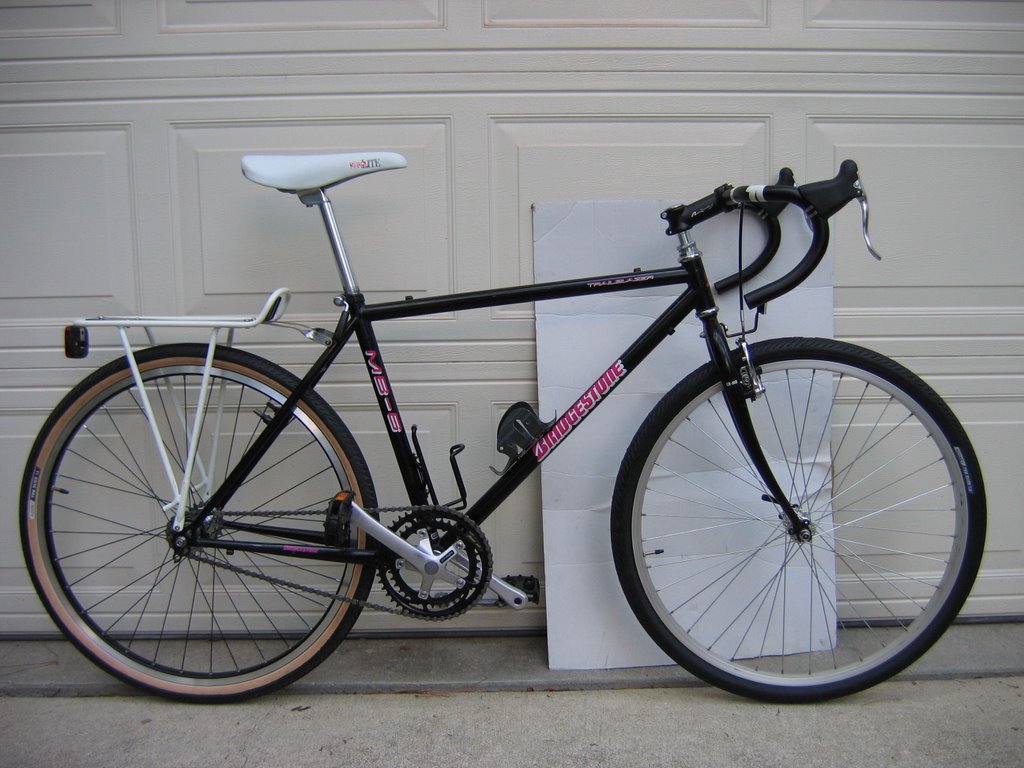
First Commute on the Fixie

I put some white handlebar tape (to match the saddle and rear rack) on the bike and I rode into work today, ~22 miles round trip on rolling hills. Going up hills is really fun. Flats are OK. Downhills are a pain in the... Independent of the downhills, the long, low reach bar configuration are a pain in the lower back and hands after 6 or 7 miles. I think I definitely need a higher rise, shorter length stem, or maybe mustache bars that go up and back.

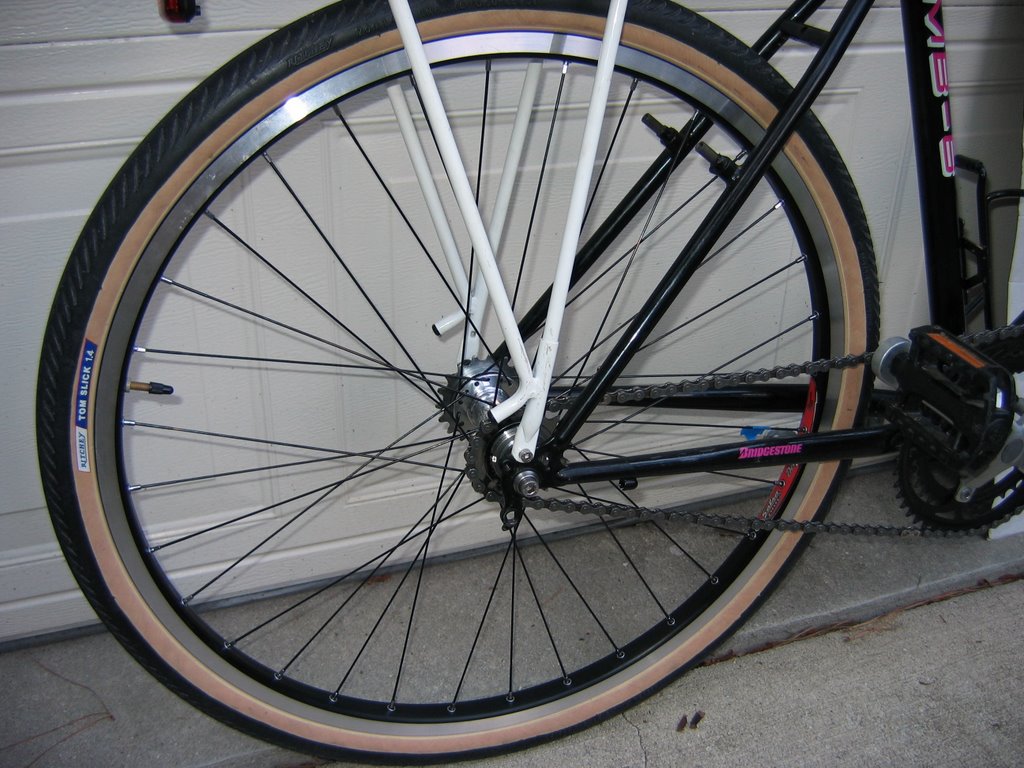
It still need to try riding fixed with clipless pedals to see if that would help things on higher cadences vs. the cageless platform pedals I've been using.

I think I might need to work on the chain line or maybe chainring "truing" since I'm getting some noise under torque that I don't hear when just rolling the bike around on foot or when pedaling really slowly.

I had a couple of incidents of verbal abuse from stereotypical "Soccer Dad" (on the way into work) and "Young Redneck in a Pickup" (on the way home). In both incidents, they were annoyed that I was taking up a whole lane while approaching an intersection where I needed to make a left turn. In both cases, there was little traffic on the road and they could have had entire lanes to themselves if they wanted. I guess some people just have way too much stress or whatever else is wrong with their own lives.

Sunday, June 11, 2006

First fixie ride beyond the neighborhood

I did a quick test with an adjustable rise stem and the Specialized Body Geometry handlebars that I had taken off my road bike, hoping to raise the bars a little, but the swooping shape of the BG bars actually ended up putting the bars lower. Plus they're too narrow (42cm). I restored the original stem and bars I had on before, moved the brake hoods up higher, rotated the bars up a little and it looks like a good configuration even with the bars a few inches below the saddle.

After a few loops around the neighborhood to build confidence, I took the bike out in fixie configuration out to the supermarket, a mostly flat route, but I took the variation that added some hills. It worked out pretty well except for a couple of things:

- the front rim has a noticeable bump at the joint that is enough to give a bit of jerking while braking (I trued up the rim and added tension as best I could, but I can see building a new front wheel in the near future)

- over one speed bump, I forgot I was on a fixie and tried to coast over it--doh! That was actually near the end of my return trip home, so it's not like I hadn't properly traversed more of the same just minutes before

I can already see that I'll enjoy riding fixie on short trips without too much traffic. Perhaps with more experience, I'll see it as another option on any ride I'd do other than perhaps those with the biggest hills.

Tuesday, June 06, 2006

Eagle Leaves the Nest

I finally took it out for a real ride yesterday, to the supermarket to pick up a few groceries. I wimped out, riding it in single-speed mode rather than fixed, though I did take a risk in having only a front brake installed :-). It's a Tektro Mini-V brake connected to Tektro R200 brake levers (apparently clones of Campy's aero brake levers).

The Mini-V brake is intended to be used with road levers. It's got shorter arms so less cable pull is needed vs. full sized V brakes. It leaves very little clearance with the 38-559 tires though, and the levers do get quite close to the bars before giving strong braking power. I might eventually put a Travel Agent cable pull multiplier on there. I will certainly do that when I install a full sized V brake on the rear.

On this ~4 mile ride, I think the reach to the bars is too long for me, so I may need to get either a shorter stem (currently 90mm) or maybe mustache bars rather than the drop bars on there now.

I also did some extended, super slow speed riding in fixed mode just to get a feel for it and try out braking and coming to a stop. I found speed control to be pretty simple, but coming to a complete stop took several tries before I could feel remotely comfortable doing it, even on level ground. One time I tilted the bike too far to get a foot down and managed a low speed pedal strike. Ooops :-(

I also tried a few sprints--man, those are fun and the direct feel of the bike is amazing. Until my left foot slipped forward off the pedal. I ended up putting both feet up in the air and letting my speed drain going up a slight incline. Kinda scary!!! I hope never to do that again. Gotta get some clipless pedals on there.

One more annoying thing is that I can't seem to get the seat post tight enough. I had swapped the posts from a Kalloy 26.2mm two-piece post (a pain to adjust) to a Kalloy 26.2mm one-piece post, so they should be a perfect match. I think the QR seatpost binder may need replacing since I can turn it even when it's engaged as tight as I can get it.

Sunday, June 04, 2006

New riding layout?


For a while now, I've been riding DF bikes (i.e. Diamond Frame, or safety bike) with the handlebars raised up to be about level with the saddle.

Since this bike was an MTB with a tall-ish threaded stem for MTB bars, I needed to make some adaptations to make it take road bars and brakes. I got a Profile Designs threaded->threadless stem adapter to use with a threadless stem I already had. I figure there's more and cheaper choices available in threadless stems in terms of length and height at this point.

With this setup, my Vetta Race Lite saddle is a few inches above the level of the bars (Titec Malone 44cm drop bars). This is giving me a lower, more stretched out riding position than I've used recently, if ever. In the few minutes I spent riding around the neighborhood, this position actually felt very comfortable. I'd be insanely happy if I can get this low & aero on a DF bike and not be in crippling pain over say a 11 mile commute into work.

Gee, I might end up as fast as I am on my Bacchetta Strada recumbent!

We'll see.

My First Wheel!


OK, I did it. I built a wheel from scratch, rode it around the neighborhood and it didn't taco or even ping.

Since this is the rear wheel on a fixie/ss flip-flop hub, it's symmetrical, so it isn't quite the challenge that building a dished rear wheel is.

Components:
  • White Industries Eric's Eccentric Hub, 130mm width (yep, this Bridgestone has 130mm rear spacing)
  • Salsa Delgado 559 rim, black, welded (the weld is kinda ugly and a little rough)
  • Wheelsmith double butted 14/15 gauge black spokes with silver brass nipples
At first I thought the black spokes were going to be a mistake because of the highly polished silver hub, but now that it's all together, I must say it's a very pretty combo, alternating silver/black out from the hub to the spokes to the nipples to the rim at the spoke holes to the machined braking surface. That silver/black theme runs through the whole bike, becoming a white/black combo at the rack, the saddle and the bar tape being white on a black frame.

Mistakes/issues:
  • The third set of spokes during lacing, I of course put them on the wrong holes and had to redo them.
  • I'm not sure I have the "improving the spoke line" stuff suggested by both Jobst Brandt and Sheldon Brown in their wheelbuilding guides quite right. I pressed the spokes at the hub and squeezed crossing pairs before tensioning up, but it still doesn't look quite like the drawings in Jobst's book.
  • I don't have any other wheels with double butted spokes, so I can't use the suggestions to compare the plucked tone with that of a known-good wheel of the same gauge spoke (and presumably the same wheel diameter). The tone is higher than most of my wheels, including the drive side of rear wheels, but when I squeeze the spokes, they seem more flexy. I suppose that might be a good thing with the double butted spokes being more resilient, or it could mean my tension isn't high enough yet. I'll probably give all the spokes another turn and see how that goes.
I still don't have any pictures yet, but the wheel is really nice looking, IMHO.
[EDIT--obviously I've since posted pictures :-)]

Saturday, June 03, 2006

Inaugural Post

I've just started on yet another "new" bike project to help me go from point A to point B (and back to A of course). I want to document the project, so why not setup a blog for it and other things related to transportation cycling?

The project is the conversion of an early 90's vintage Bridgestone MB-6, welded steel 21-speed MTB into a single-speed/fixed-gear road bike. This bike had been gathering dust and rust in the garage, taking up storage space.

Somehow, I've caught the fixie bug though I have never actually ridden one. I was set on buying a Giant Bowery from Frank's Cyclery but noticed that I don't really have storage space for yet another bike in the garage, hence the conversion of an existing, unused bike.

There are a number of possibilities for this type of conversion (i.e. a vertical dropout frame), but I chose what I felt would be the most likely to work out well, i.e. a White Industries eccentric rear hub built into a new wheel.

This is turning out to be a three-for-one project:
  1. I get a fixie out of it
  2. I don't consume more storage space with yet another bike
  3. I get to build my very first wheel (a rear one at that, though non-dished)
And how is all this related to cycling from point A to point B? Not especially much other than a fixie is supposedly a unique cycling experience that is well suited for short trips on mostly level ground, and that fits one of my transport cycling needs very well (except that point B is at the top of a moderate hill of the 40mph-on-the-descent-if-I-want variety).

What more could I want? A new cycling experience and it's good for transportation.

I hope to have some interesting pictures to post soon.